If you have any questions at all, please don't hesitate to either post a comment for clarification or e-mail me. I will do my best to explain it to you. :)

A very excited little girl with her supplies! :)
Supplies:
1 skein of yarn (She chose the Peaches & Creme yarn- she is going to make a dishrag)
1 crochet hook (Size "F")
Note: Your choice in yarn will determine your crochet hook's size. Look on the paper sleeve to find out what the recommended size is.

Note: These directions are for a right-handed person. I've never tried to crochet left-handed but I would assume you do the same thing.
Step 1: Unwrap your yarn (take the paper sleeve off) and locate the end.
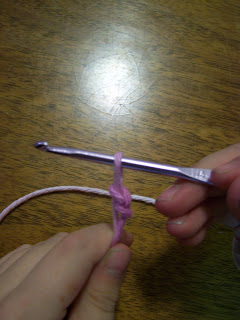
Step 2: Wrap your left thumb with the yarn as shown in the photos below. You will make an "X" on the top of your thumb.


Step 3: Insert your hook through the yarn as shown below.

Step 4: Take the yarn and hang it over your hook.

Step 5: Pull the yarn through the loop. You should end up with a loop (slip knot) with your hook through the loop. See photos for clarification.


Step 7: Repeat your chain stitch until you reach your desired length, it will resemble a braid. 
Now we are moving on to your double-crochet stitch... 

Step 11: Wrap your yarn around your hook.

Step 12: Pull hook through your chain.

It should look like the photo below.

Step 13: Wrap your yarn around your hook.

Step 14: Pull your yarn through the first 2 loops. See photo below. 
Step 15: Wrap your yarn around your hook.

Step 16: Pull your yarn through the second 2 loops. See photo below.
Note: You will have 1 loop remaining.

Step 17: Repeat Steps 11-16 sequentially for the rest of your chain. (e.g. 35 times for a dishrag) See photo below. 
Step 18: Make 3 chain stitches when you reach the end of your row. See photos for clarification.


Step 4: Take the yarn and hang it over your hook.

Step 5: Pull the yarn through the loop. You should end up with a loop (slip knot) with your hook through the loop. See photos for clarification.


Step 6: Wrap your yarn over your hook again, and pull through your loop.
You have just completed a chain stitch! :)


Step 7: Repeat your chain stitch until you reach your desired length, it will resemble a braid.
She did 35 stitches for her dishrag- if you are doing a scarf, it will depend on how wide you want it.
Note: Remember how many stitches you do. You will have to make sure to have that many stitches for each row you complete later on, or your project will become uneven.

Now we are moving on to your double-crochet stitch...
Step 8: Make 3 more chain stitches.
Step 9: Wrap your yarn around your hook.

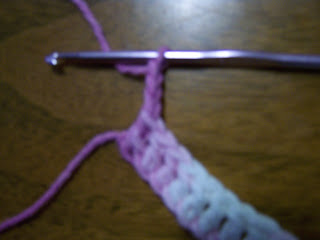
Step 10: Insert your hook through your chain stitch 'rope' 3 stitches back. See photo for clarification.

Step 11: Wrap your yarn around your hook.

Step 12: Pull hook through your chain.

It should look like the photo below.

Step 13: Wrap your yarn around your hook.

Step 14: Pull your yarn through the first 2 loops. See photo below.
Note: You will have 2 loops remaining.

Step 15: Wrap your yarn around your hook.

Step 16: Pull your yarn through the second 2 loops. See photo below.
Note: You will have 1 loop remaining.

Step 17: Repeat Steps 11-16 sequentially for the rest of your chain. (e.g. 35 times for a dishrag) See photo below.

Step 18: Make 3 chain stitches when you reach the end of your row. See photos for clarification.


It should look like this.
Step 19: Flip your completed row like shown below. Wrap your yarn around your hook.

Step 20: Insert your hook into the top of the last stitch you completed before the 3 chain stitches in Step 18.

Step 21: Complete your double crochet stitches (Steps 11-16) for the rest of your row. 
Step 22: Complete Step 19 to finish your 1st row of double crocheted stitches. 

Step 21: Complete your double crochet stitches (Steps 11-16) for the rest of your row.

Step 22: Complete Step 19 to finish your 1st row of double crocheted stitches.
Step 23: Begin your 2nd row of double crocheted stitches.

That is all- whew! ;)
Continue your double crocheted rows until you reach the desired length of your project. It will depend on what you are making (e.g. dishrag, scarf, pot holder, doll blanket, etc) where you stop.
The post tomorrow will have finishing off your project, changing yarn colors and a single crochet stitch.

You have a veryadorable daughter.
ReplyDelete